As we discussed in a previous post, keeping your WordPress site updated is key to good WordPress site management, security, and performance. Now we’ll explain how to carry out the process of updating your WordPress site.
If you're already a uPress customer, then updating your WordPress site is easy. All you need to do is log in to your Admin panel and click on Choose your site » WordPress Tab » Automatic Update to WordPress, as shown in the image below.
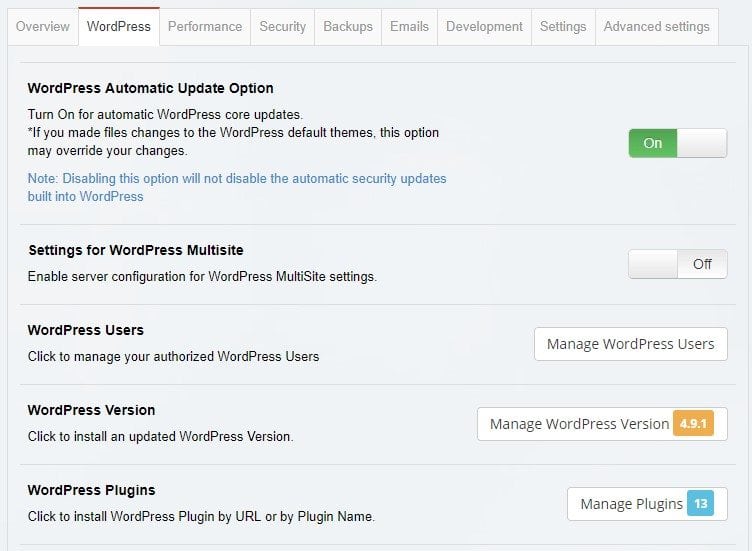
Efficient WordPress site management is as simple as that.
Migrate to uPress within 24 hours
If you are not a uPress Customer, don't panic. There are several different ways to do this and they are all pretty simple. Or, you could switch over to our managed WordPress hosting packages listed right above by clicking one of those green buttons.
There’s a messaging system built into your WordPress site management dashboard which notifies you about updates every time you log into your WordPress account. You'll see a red circle with a number inside it near the top of your left sidebar when you log in.
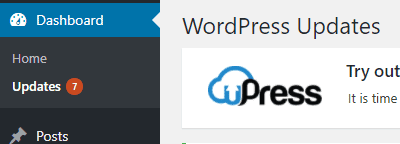
Click on the Updates tab in the sidebar and follow the on-screen instructions to install the updates listed.
Alternatively, you can receive an email whenever there's a new update. You just need to install the WP Updates Notifier plugin from the plugin store, and follow the instructions to activate it.
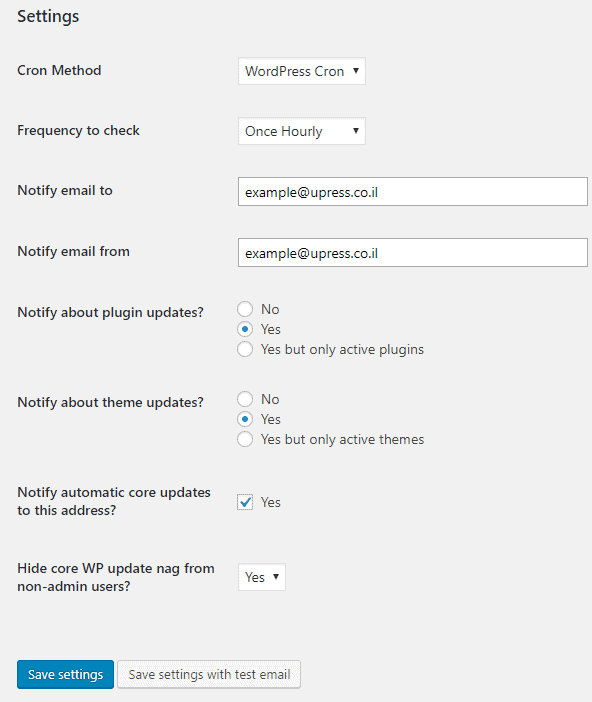
Once it's installed and activated, go to "Updates Notifier" to put your email address in the extension settings. You can choose whether to receive emails about every update, or only about core updates, theme updates, or plugin updates, then click "Save settings," or "Save settings with test email."
If you don't receive a test email, contact our customer support.
If you're using WordPress 3.7 or higher, you can turn on automatic updates for minor releases that fix bugs and other safety issues. You can also permit automatic updates for larger releases, extensions, and topics.
Be aware, though, that allowing automatic updates can be dangerous for your WordPress site management if you don't have a Dedicated Managed Storage Server that monitors for any mishaps. If you always permit automatic updates without any backup, there's a risk that an update could damage your site. Without a recent backup, you won't be able to correct it.
There are two ways to enable automatic updates: using an extension, or with code.
Go to the WordPress store to install and run the Easy Updates Manager add-on.
After activation, go to Control Panel » Updates to adjust the plugin settings.
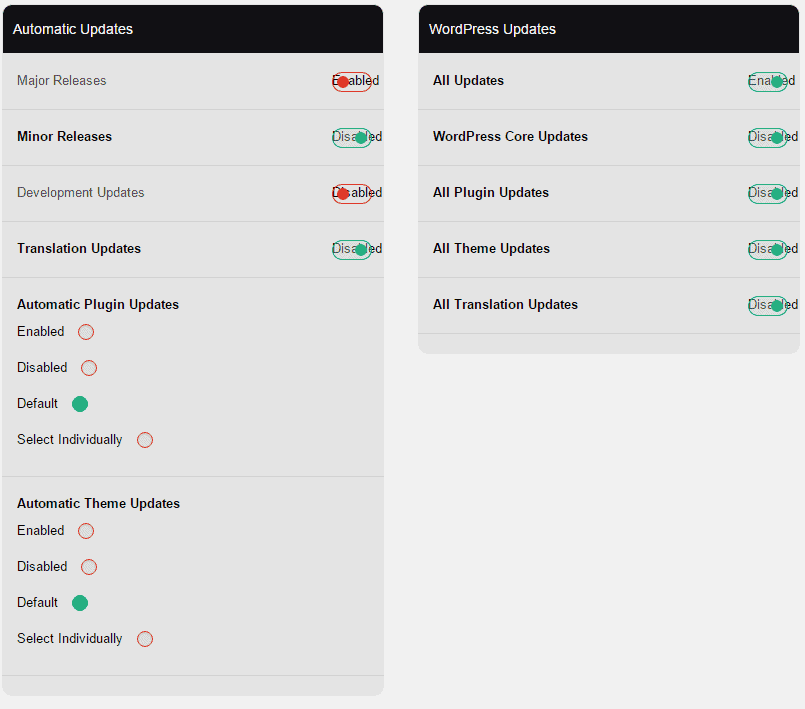
You'll see that one of the options is Automatic Updates. Here, you can turn on Automatic Updates for core WordPress site management updates, extensions, themes, and translation files updates. Once you have finished, click Save settings.
If you're confident about handling code as part of your WordPress site management, you can permit automatic updates on a code level.
define('WP_AUTO_UPDATE_CORE', true);To turn on automatic updates for themes and plugins as well as for core WordPress site management updates, add these lines of code as well:
add_filter( 'auto_update_plugin', '__return_true' );

add_filter( 'auto_update_theme', '__return_true' );
That's all it takes! Hopefully, this article helped you feel in control of your WordPress site management updates.
As managed WordPress hosting experts, we know what we're talking about, whether you need advice on updating to a new version, you're debating how much bandwidth you really need, or you want the full lowdown on security. You can trust us with the entire gamut of WordPress questions, so the only one left is... why aren't we hosting your WordPress site yet? Click below and join us.

