One of the important ways to make your website stand out from your competitors, and match your WordPress customization to the needs of your users, is to change the time and date format. You might want to change the time zone if you're targeting users in a specific location, or adapt the date and month settings to match local custom. Or you might choose to hide the year or display a 24-hour clock.
We were recently asked how to change the date and time format, by a small business owner who was carrying out some WordPress customization on their own. As we explained the fairly easy process, we thought that more of our users might be interested to learn the same WordPress customization skills. As managed WordPress hosting experts, we have a wealth of knowledge to share!
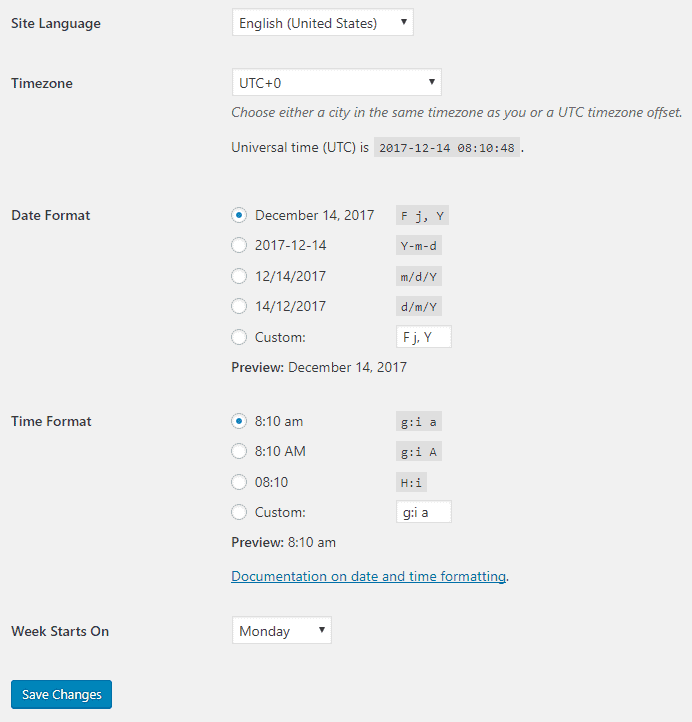
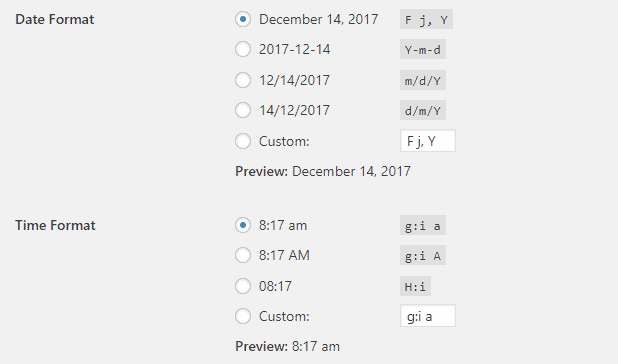
Your WordPress site comes with a built-in WordPress customization for a few different date and time formats. Visitors who have User and Programmer status can choose their preferred date and time from the preset options.

Here you can set the time zone for your website, along with the date and time format, and click Save Changes.
Immediately customize your date and time formats - click here
If you're not happy with any of these options, you can insert your own WordPress customization, using characters for date and time formatting. Here are some of the characters you need to know to set your own WordPress customization for date and time formatting:
D - the date of the month in 2 digits, such as 31 or 07
M - the month in number, such as 11 for November
Y - the year in four digits, such as 2017
y - a lower-case y displays the year in 2 digits, such as 17
L - the day of the week, such as Sunday or Monday
F - the month in text, such as November
H - the hour
i - the minutes past the hour
S - seconds
You can see the full list here
You can test out different designs in the Custom box at the bottom of each set of options. When you've finished, you'll see a preview of the date and time format.

If you're happy with it, click Save. Your WordPress customization will be saved until you reset them.
A lot of users ask us how to show the time next to the date on WordPress posts. There are a few different ways to carry out this WordPress customization.
Many users prefer to edit the child template for the whole WordPress site, even though this approach to WordPress customization is technically very difficult. You'll need to navigate to the child template of your site, so go to your WordPress dashboard, click Appearance, click Themes, then click on the theme details.
You'll need to paste this line of code into your child template.
<?php echo get_the_time(); ?>And then you're done. Every subsequent post or page will show the time as well as the date.
Fortunately, there's an easier, code-free way to add the time alongside the date. You might not know this, but whenever WordPress displays the date in a post, it also displays the time alongside it. It's just that most people never add the time tags into the date box, so only the date is visible.
You can change this by adding time characters alongside the date in your custom box. For example,
d/m/Y h:i
Will appear on the screen as 31/11/2017 11:28
There are so many creative ways that you can apply WordPress customization to your WordPress site. For example, you can show the last time your post was updated instead of the date it was published, or display the publication date in relative terms, such as "Published 2 days ago." But we'll discuss these topics in more depth in a separate post.
As managed WordPress hosting experts, we know what we're talking about, whether you're asking what is managed WordPress hosting, how does it compare to regular hosting, how to manage security updates, or even formatting the time and date on your WordPress site. You can trust us with the entire gamut of WordPress questions, so the only one left is... why aren't we hosting your WordPress site yet? Click below and join us.
Immediately customize your date and time formats - click here


