
If you have reached this article, it means you are trying to prevent spam arriving from the contact forms on your site. The vast majority of these messages are automated spam sent by robots, not by real people. So the most effective and fastest solution is installing reCAPTCHA, which knows how to tell the difference quite accurately.
The vast majority of these messages are automated spam sent by robots, and not by real people.
Therefore the most efficient and fastest solution is installing reCAPTCHA, this solution can fairly smartly tell whether I (as the user, or the machine filling out the form) am behaving like a human being or a bot.
In this article, we will show you How to add reCAPTCHA to contact forms in order to prevent receiving spam messages.
One more thing before we start: in this guide we will carry out the demonstration on the well-known and familiar plugin Contact Form 7 (because of its widespread use), but of course it is possible to install reCAPTCHA on any contact form plugin.
Why use reCAPTCHA?
The first reason is Spam blocking by human verification, all automated spam attempts will be blocked across the board.
The second reason is that it Simple and easy to use For users, Google has improved its CAPTCHA tool and we are currently using reCAPTCHA v2.0,
As of today, instead of entering text – users can simply Tick the checkbox with the mouse and the tool understands that this is not an automated spam bot.
How do you install reCAPTCHA?
reCAPTCHA is a free service provided by Google, but to activate it two "authentication keys".
These keys can be created easily by clicking on the link of reCAPTCHA.
Once you have logged in to the site, click on Get reCAPTCHA to continue.

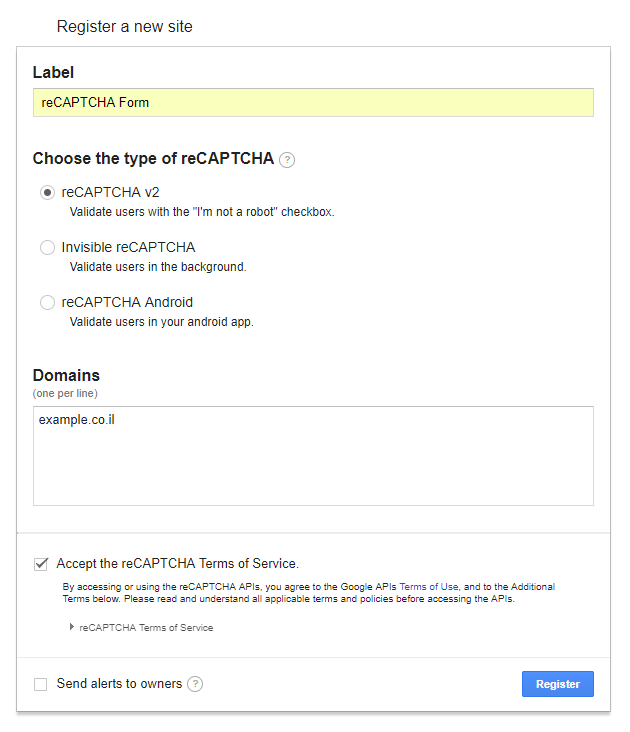
You will be asked log in using your Google account . After logging in, you will be taken to a page where you can register your site (add a new site) for the reCAPTCHA service.
Enter the the site name in the "Label" field. This is for your use, so that you can identify the site if you ever need to get the keys again.
Then you need to add the Domain name, for example upress.co.il. To confirm the action, click the Register button.
You will now be taken to the page that displays the The site key and the secret key for the new site you added.

Copy your site key and your secret key (we will need them in the next step), and return to managing your site in edit mode (to the WordPress interface as administrators).
Go in the sidebar to Contact forms > Integrations and paste the the site key and the secret key under the reCAPTCHA settings.
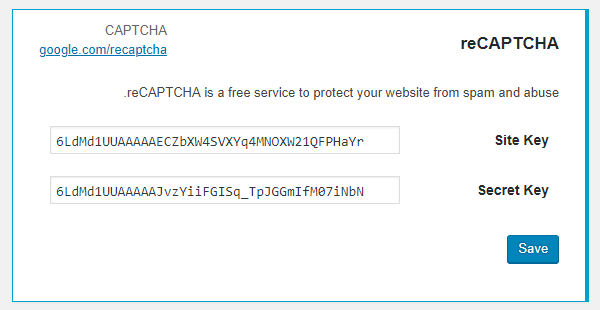
Don't forget to click the button Save settings to save the changes.
Adding reCAPTCHA to your forms
Now we will create a new contact form (or edit an existing form).
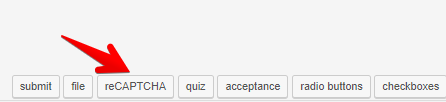
In the new form you created, you need to click the reCAPTCHA button at the top of the screen (note that the place where the mouse cursor is positioned will be the location of the reCAPTCHA box)
After you have filled in the rest of the form details, click Save Settings button, and the form is ready to be embedded in your site.
The final result should look like this:
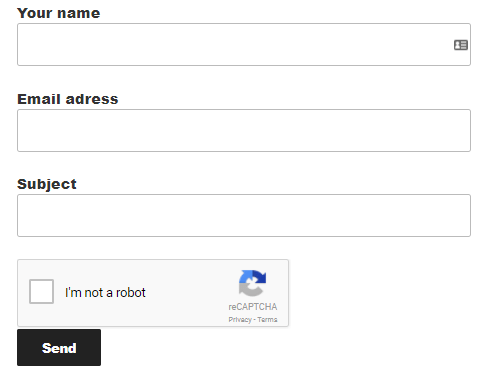
This is a ready-to-use form ready to use, protected by the wonderful reCAPTCHA technology developed by Google.
