
Google PageSpeed Insights
Site performance testing tools such as Google PageSpeed Insights, Pingdom, Uptrends, GTmetrix, they are always an excellent way to gauge your site's performance.
While these metrics can be very useful, it is important to keep things in the right perspective.
It is true that the data and information obtained from these tools can indeed help improve the quality of your site, but Don't forget the user experience.
In this article we will show how, through a few simple actions, A score of 100/100 can be reached in the Google PageSpeed Insights testing tool on WordPress sites.

First, don't be obsessed with getting a 100/100 score – stop and think
Lately we have come across quite a few users who are desperately trying to reach a score of 100/100 in Google PageSpeed Insights,
Some do so because they are trying to speed up their site's performance, and some because a client demands that they reach this score (this indeed happens quite often).
Sometimes you need to stop for a moment and think Why are we trying so hard to get this score of 100/100?
Don't think of it only as a "point that needs to be reached"; the main reason Google developed the performance testing tool is to serve as a guideline to improve site performance, and provide recommendations and suggestions for improvement in order to optimize your site, and by following these guidelines, hopefully you will receive a faster WordPress site in terms of user experience.
Another thing that is important to remember: It will not be possible to achieve a 100/100 score in every situation; this is a matter that can depend on the settings your hosting server.
1. Optimize Images
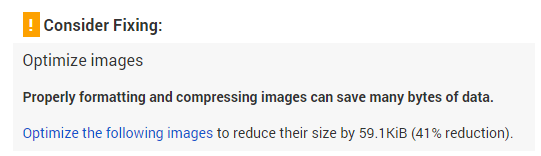
Google's speed testing tool asks us to carry out optimization / compression of images of our WordPress site.
To fix this error, we simply install the WordPress plugin Wp-Smush Pro,
This plugin is provided to all uPress customers at no cost, and can be installed under the uPress management panel > WordPress tab > Install recommended plugins.
 Original website and performance example used in the article. Refer to the English explanation for the comparison.
or alternatively, you can also use Wp-Smush in the free version.

This plugin focuses on compressing unused size in images, which means you are not sacrificing or harming quality in order to optimize the image.
There is a bulk-optimization option that lets you optimize the entire media library with the click of a button (no need to go over each image separately),
and after that, of course, the process will be automatic – optimization will be performed on every new image uploaded to the media library.

2. Minify Javascript and CSS
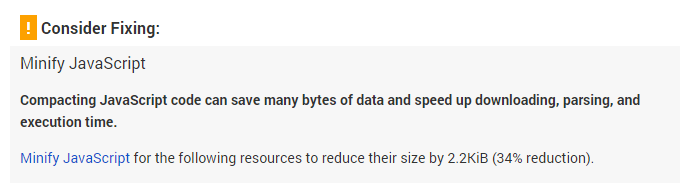
Google's speed testing tool now asks us to perform minifying whitespace and reducing lines in JavaScript, CSS and HTML.
To fix this problem, we install the Wp-Rocket plugin.
This plugin is provided to all uPress customers at no cost, and can be installed under the uPress management panel > WordPress tab > Install recommended plugins.
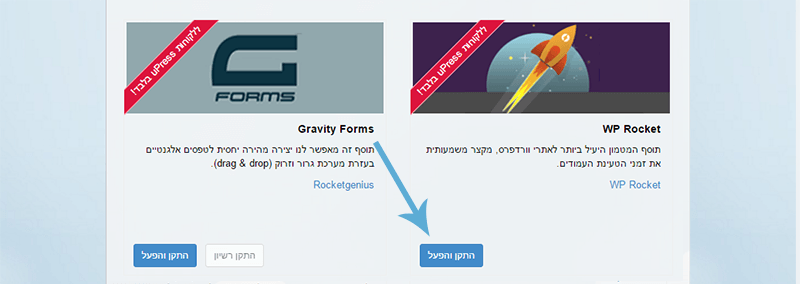 Original website and performance example used in the article. Refer to the English explanation for the comparison.
or alternatively you can use the free plugin Autoptimize free one.

In any case, we will want to enable the following settings (in both plugins):
- HTML minification and reduction
- Minify and reduce JavaScript
- CSS minification
After checking and enabling these settings, the JavaScript, CSS and HTML code will trim unnecessary spaces between lines, trim empty lines, and reduce the weight of the original files by tens of percent.
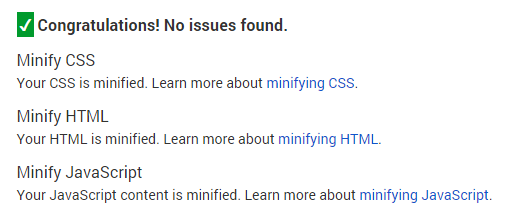
3. Leverage Browser Caching
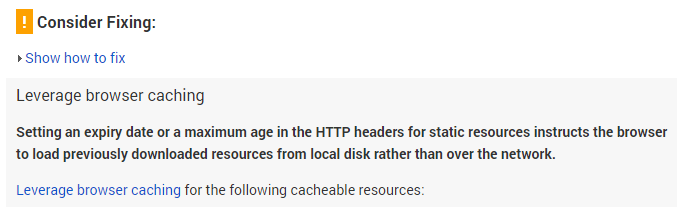
Google's speed testing tool now alerts us about improving the way the browser cache works.
which means that we need to hand the browser the files from our site, and in the process of handing them over – tell it that we we won't need the files for X amount of time, so that it will not ask for them the next time we visit the site.
In order to fix this error:
If you are a uPress customer, we will enable the Leverage Browser Caching option under the Management Panel > Performance tab.
 Original Hebrew uPress control panel. Follow the English instructions in this article; labels and positions may differ in the current interface.
If not, we will need to add code snippets:
Apache servers
We will add the following code snippet to the .htaccess which is located in the home directory – public_html – of our WordPress site.
Header set Cache-Control "max-age=84600, public"
Nginx servers
We will add the following code snippet to the nginx.conf file of our WordPress site.
location ~* \.(js|css|png|jpg|svg|jpeg|gif|ico)$ {
    expires 2d;
    add_header Cache-Control "public, no-transform";
}
The Google Analytics issue
Another issue we were exposed to (and you will probably be exposed to it too if you useGoogle Analytics), is a cache lifespan that is too short for the Google Analytics script file.
The subject is a bit funny because this message comes from a script created by Google, in a testing tool created by Google.
This issue arises because the analytics.js script file has a cache expiration of only two hours. Google has already stated that they are not going to fix this.
which in practice leaves all site owners who use the service of Analytics with an error message that they simply cannot fix it.
This can undoubtedly be a very frustrating subject, especially for people who were tasked by their client with achieving a better score in Google PageSpeed Insights and who have to tell the client that it is impossible to fix because Google doesn't allow fixing it (sounds a bit crazy).
One solution we have found so far to fix this message is the script by Jesse Luoto, this is a small improvement version of the original Analytics code, using the REST API protocol.
You can use the version of the script provided by jsdelivr, or download it to your site and install it locally (if you have the technical knowledge).
This version automatically sets the longer cache expiration, which actually resolves the Google Analytics issue the longer cache expiration, and so the Google Analytics issue is effectively solved.
All you have to do is copy the following piece of code and insert it directly into the body of the site of your site, right before the Head tag; note that you are updating your tracking code in place of the 'UA-XXXXXX'.
<script src="https://cdn.jsdelivr.net/ga-lite/latest/ga-lite.min.js" async></script> <script> var galite = galite || {}; galite.UA = 'UA-XXXXXX'; </script>
Another solution is to keep a local version of the analytics.js file in your site's folder.
Google does not recommend doing this (for fear that one day they will update their script and you will be left with an outdated script), but if you set up a script that pulls the most up-to-date file, it should not be a problem.
A third and final solution is a WordPress plugin called Host Analytics.js Locally which defines a scheduled action that takes care of checking, every X time that was set, whether there is an update to the analytics.js file.
In any case, each of the proposed solutions will do the job, and will solve the Google Analytics issue.

4. Enable Compression
Of course, we enable Gzip compression across our entire server fleet at uPress by default, and likewise on all the servers through which we provide services to the general public.
If you are hosted on a server that does not enable Gzip compression, follow these instructions:
Apache servers
You can enable Gzip compression by adding the following code to the .htaccess of your WordPress site.
  # Compress HTML, CSS, JavaScript, Text, XML and fonts
  AddOutputFilterByType DEFLATE application/javascript
  AddOutputFilterByType DEFLATE application/rss+xml
  AddOutputFilterByType DEFLATE application/vnd.ms-fontobject
  AddOutputFilterByType DEFLATE application/x-font
  AddOutputFilterByType DEFLATE application/x-font-opentype
  AddOutputFilterByType DEFLATE application/x-font-otf
  AddOutputFilterByType DEFLATE application/x-font-truetype
  AddOutputFilterByType DEFLATE application/x-font-ttf
  AddOutputFilterByType DEFLATE application/x-javascript
  AddOutputFilterByType DEFLATE application/xhtml+xml
  AddOutputFilterByType DEFLATE application/xml
  AddOutputFilterByType DEFLATE font/opentype
  AddOutputFilterByType DEFLATE font/otf
  AddOutputFilterByType DEFLATE font/ttf
  AddOutputFilterByType DEFLATE image/svg+xml
  AddOutputFilterByType DEFLATE image/x-icon
  AddOutputFilterByType DEFLATE text/css
  AddOutputFilterByType DEFLATE text/html
  AddOutputFilterByType DEFLATE text/javascript
  AddOutputFilterByType DEFLATE text/plain
  AddOutputFilterByType DEFLATE text/xml

  # Remove browser bugs (only needed for really old browsers)
  BrowserMatch ^Mozilla/4 gzip-only-text/html
  BrowserMatch ^Mozilla/4\.0[678] no-gzip
  BrowserMatch \bMSIE !no-gzip !gzip-only-text/html
  Header append Vary User-Agent
Nginx servers
You can enable Gzip compression by adding the following code to the nginx.conf file of your WordPress site.
gzip on;
gzip_comp_level 2;
gzip_http_version 1.0;
gzip_proxied any;
gzip_min_length 1100;
gzip_buffers 16 8k;
gzip_types text/plain text/html text/css application/x-javascript text/xml application/xml application/xml+rss text/javascript;
gzip_disable "MSIE [1-6].(?!.*SV1)";
gzip_vary on;

5. Remove Query Strings from your static resources
What are Query strings, anyway?
Query strings are all kinds of links we encounter that contain characters such as "&" or "?".
JavaScript or CSS files often contain, as part of their link, query strings meant to identify the current version of the file and to prevent the file from being cached when a version is updated.
For example, a link that includes query strings should look like this:
/wp-includes/css/framework.extras.css?ver=4.5.3
WordPress themes use Query strings (Trick) to prevent caching of JavaScript or CSS files when a version is updated. For example:
The file framework.extras.css?ver=4.5.3 and the file framework.extras.css?ver=4.6 – the browser interprets them as two completely different files. (although they are exactly the same file, with a trick to prevent caching)
One way to solve this problem is to add the following code snippet to your WordPress site's functions.php file.
function _remove_script_version( $src ){
$parts = explode( '?ver', $src );
return $parts[0];
}
add_filter( 'script_loader_src', '_remove_script_version', 15, 1 );
add_filter( 'style_loader_src', '_remove_script_version', 15, 1 );
Another option is to install the free WordPress plugin – Query Strings Remover.

This plugin removes all the "&" or "?" from your static files such as CSS or JavaScript.
This action will improve your site's cache performance and raise the score in all testing tools such as Google PageSpeed Insights, Pingdom, Uptrends, GTmetrix.
All you have to do is install the plugin; the action is performed automatically. But do not forget to clear the cache from your caching plugins after installation.The action is performed automatically. But don't forget clear the cache from your caching plugins after the installation.
6. Render-Blocking Resources Above the Fold (Advanced level)
Now, Google's speed testing tool warns us that we have JavaScript and CSS files above the fold (above the fold).
What does above the fold mean?
This is a term that generally describes the top part of a newspaper (visible at first glance without turning over or opening the newspaper).
In another context, on a website or a WordPress site in our case, this term means the upper technical part visible to the visitor without scrolling the page.
For demonstration, on the uPress site you can see the fold marked by the red line:
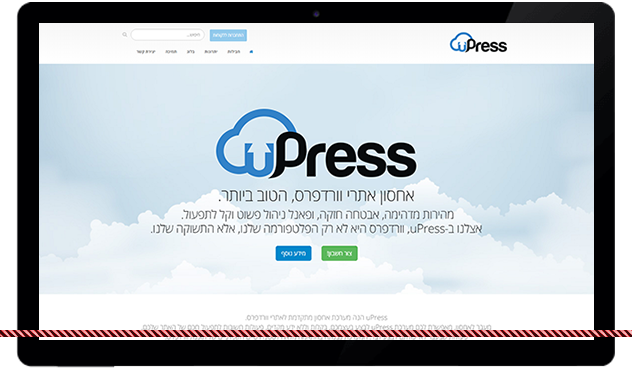 Original uPress/WordPress example used in the article. The screenshot retains its original Hebrew interface.
This problem usually has Three very common scenarios, and they are your JavaScript/CSS files, Font Awesome, and Google Fonts fonts.
JavaScript/CSS files
The first and main scenario we want to deal with is the download of All external Javascript and CSS files, and move them below the fold,
In order to fix this problem we will actually go back to the plugin Autoptimize which we recommended in the section focusing on Minify JavaScript and CSS, and we will enable the following settings:
- Under the JavaScript Options category, uncheck the checkbox – Force JavaScript in
- Under the CSS Options category, tick the Inline all CSS checkbox
Another solution is through the Wp-Rocket plugin, and the solution is divided two main parts: JavaScript files and CSS files.
In order to fix the message regarding JavaScript We will go to the "Advanced" in the plugin settings, and add all the files we received a notice about under the category JS files to include in the footer of the page during the minification process.
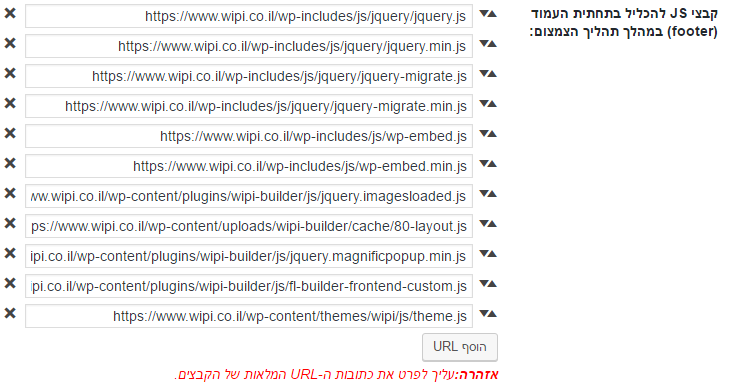 Original Hebrew WordPress interface. Follow the English instructions in this article; labels and positions may differ in newer versions.
A nice tool that can help you to get the list of static files that your site loads can be found at In the following link.
Regarding the warning message about CSS files above the fold – Wp-Rocket have already stated that they do not intend to provide a solution because it makes the site look broken, unstyled, and ruins the user experience.
Wp-Rocket We recommend going over the guide published by Google on the topic – Optimize CSS Delivery.
CRITICAL CSS
WordPress guides us to build our sites using Critical CSS, what does that mean?
This means all external JavaScript/CSS files will be loaded below the fold (in the bottom part of the page structure),
and then a situation arises in which, until the page has fully loaded fully loaded – we do not load our site's style. So how do we solve this problem?
fix this problem by using the Critical CSS that is essential for displaying our page (above the fold), and place all the critical styles Between the style tags in your site's header (header).
There are several tools across the web, such as the tool by Jonas Ohlsson for example.
who know how to receive asInput that URL address of our site, all the CSS of the site, and to give us asoutput the essential style needed to display the site (up to the page fold).
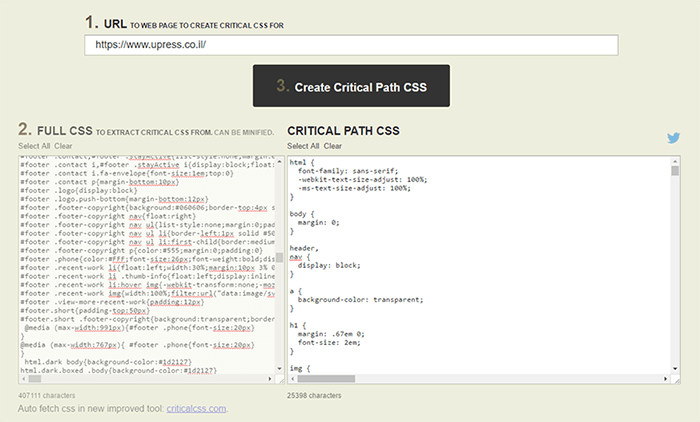
Once we have the the output, all you have to do is place the CSS Between the style tags in the top header of your site (header). So that the site is displayed properly before scrolling.
and then we can load the rest of the CSS files at the bottom of the page in the usual way.
Font Awesome
There are quite a few WordPress plugins and themes that use the Font Awesome icons folder to add icons to your WordPress site.
They usually use an external CDN service to import the latest version of the icons folder, and that's great.
The problem is when they place the request to fetch the file inside the header of your site (header), then the request becomes a Google comment about an external CSS file located above the fold.
To handle this problem, you will need to find the line of code that usually looks like this:
<link rel="stylesheet" href="path/to/font-awesome/css/font-awesome.min.css">
cut it out, and then place it again at the bottom of the page structure, right before the closing body tag.
Note: Usually this line of code will be located in the header.php file of your active design theme.
WordPress uses a hook called wp_enqueue_style in order to load the icons properly, but an advanced level of knowledge is required in order to do this.
Warning: This action is intended for advanced users, and it may cause icons not to appear if not done properly.
Google Fonts
Following the previous section, there are several WordPress themes that use the Google Fonts font directory to add fonts to your WordPress site.
For example, the Twenty Fifteen theme, which comes with WordPress by default, loads the Noto Serif font.
By default, WordPress uses a hook called wp_enqueue_style to load the fonts directly into the the header of your site (header).
As in the previous section, the request turns into a Google comment on an external CSS file located above the fold.
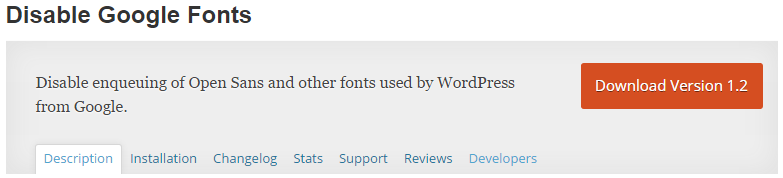
To handle this issue you can install a free WordPress plugin called Disable Google Fonts.
If you are using a custom WordPress theme, it should be a simple process to disable this,
or you can contact the theme developer and ask how to disable the importing of Google Fonts.
Next, we will request the font again, by adding the following code snippet, right before the closing body tag.
<link href='https://fonts.googleapis.com/css?family=Noto+Serif:400,400italic,700,700italic' rel='stylesheet' type='text/css'>
Note: Usually this line of code will be located in the header.php file of your active design theme.
WordPress uses a hook called wp_enqueue_style in order to load the icons properly, but an advanced level of knowledge is required in order to do this.
Warning: This action is intended for advanced-level users, and may cause fonts not to appear if it is not performed properly.
Another solution is to load the Google Fonts on your site asynchronously by using Web Font Loader.
All you need to do is place the following code snippet in the footer of your page structure, usually in the footer.php file:
<script type="text/javascript">
  WebFontConfig = {
    google: { families: [ 'Noto+Serif:400,400italic,700,700italic' ] }
  };
  (function() {
    var wf = document.createElement('script');
    wf.src = 'https://ajax.googleapis.com/ajax/libs/webfont/1/webfont.js';
    wf.type = 'text/javascript';
    wf.async = 'true';
    var s = document.getElementsByTagName('script')[0];
    s.parentNode.insertBefore(wf, s);
  })(); </script>

In summary
Sometimes you need to stop for a moment and think Why are we trying so hard to get this score of 100/100?
The main reason Google developed the performance testing tool is to serve as a guideline to improve site performance,
and to provide recommendations and suggestions for improvement in order to optimize your site, and by following these guidelines, hopefully you will get a faster WordPress site in terms of user experience.
Another thing that is important to remember: It will not be possible to achieve a 100/100 score in every situation; this is a matter that can depend on the settings your hosting server.
We hope this article answered the questions you had on the subject, and helped your WordPress sites become faster (which is in fact the ultimate goal).
