
This article details how to install WordPress on a new site under the uPress management panel.
We assume that you have already created a uPress subscription and are currently in the management panel.
It is time to start working with the hosting system and build your new site!
Let's start with–"Creating a site" (serving as the infrastructure) on which we will install a new WordPress system.
Adding a site to the hosting package
- Home >> My Sites
- Add a site
- Choosing a domain
- WordPress installation
- Language selection
- Working on the site
- Publishing the site
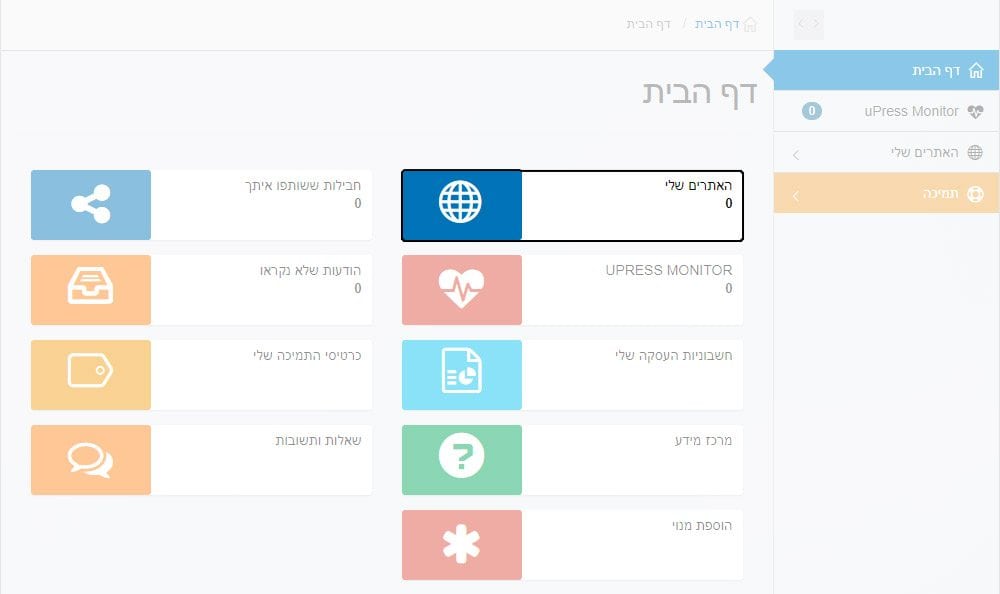 Original Hebrew uPress control panel. Follow the English instructions in this article; labels and positions may differ in the current interface.
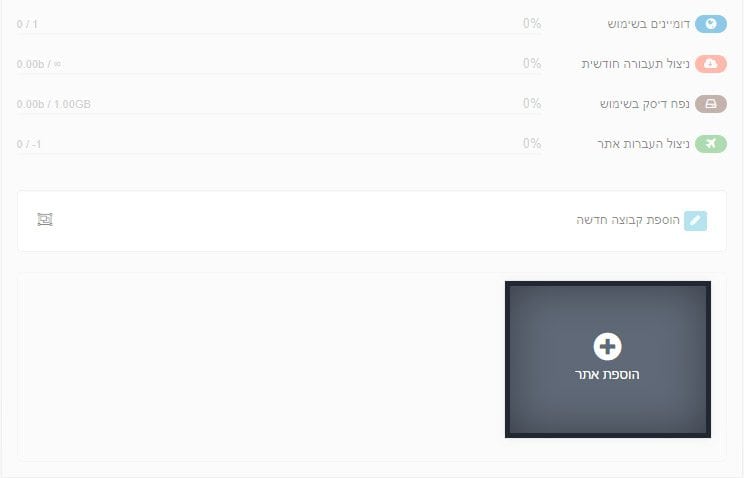
On this page you can see the plan you chose (Personal / Professional / Business / VPS server)
and the package data: domains in use, disk space, monthly traffic usage and more (you can view your hosting package usage percentages over time)
Click the "Add a site" button shown in the image.
 Original Hebrew uPress control panel. Follow the English instructions in this article; labels and positions may differ in the current interface.
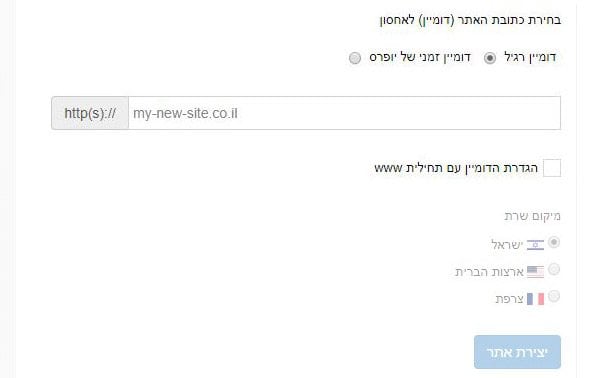
A window will now open in which we will choose the site address:
If you have a domain, leave the selection on "Regular domain" and enter the domain address exactly in the field below it:
 Original Hebrew WordPress interface. Follow the English instructions in this article; labels and positions may differ in newer versions.
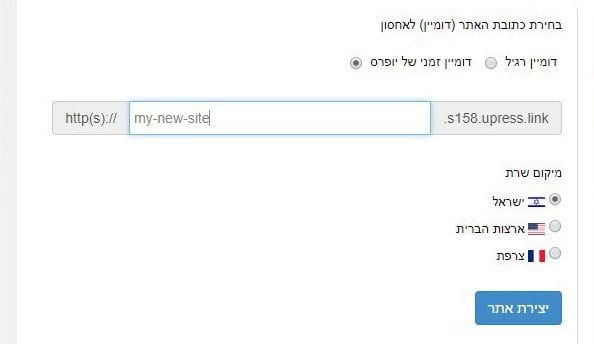
If you have not yet purchased a domain, choose "uPress temporary domain" and add Site name in this field.
 Original Hebrew WordPress interface. Follow the English instructions in this article; labels and positions may differ in newer versions.
The suffix that appears after this field will be added to the site name you chose – and will compose the temporary domain address.
Continue the process by clicking the button "Create site" and at the end of the process, click the "Enter domain management".
 Original Hebrew uPress control panel. Follow the English instructions in this article; labels and positions may differ in the current interface.
(If you clicked the "Close" a screen will appear with a gray square and below it the address you chose, with "Manage" in its center – click it and you will reach the desired screen)
Installing WordPress
Start by installing WordPress – the green "WordPress installation"
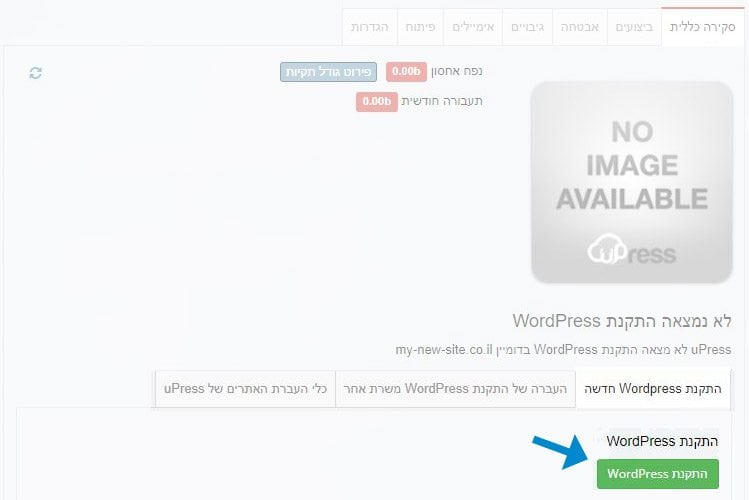 Original Hebrew uPress control panel. Follow the English instructions in this article; labels and positions may differ in the current interface.
After clicking this button, the message "WordPress has been installed. To complete the installation process, go to your domain address" will appear.
Go to the link of your address as it appears on the screen.
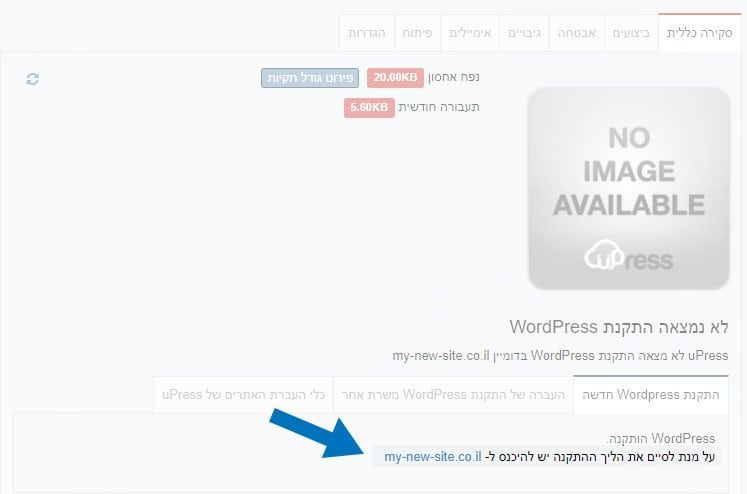 Original Hebrew uPress control panel. Follow the English instructions in this article; labels and positions may differ in the current interface.
Now continue the installation process – choose the interface language that suits you for managing the site and click Continue.
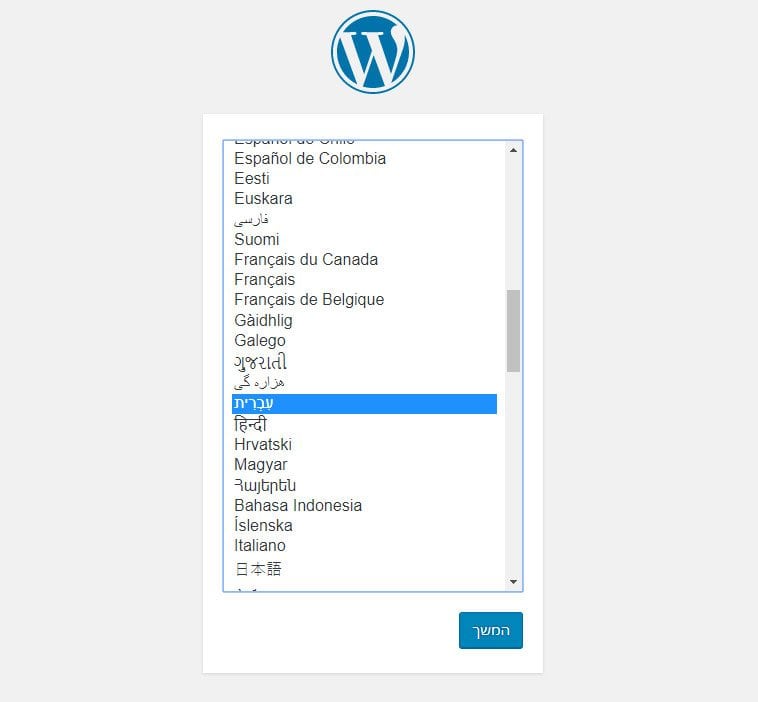 Original Hebrew WordPress interface. Follow the English instructions in this article; labels and positions may differ in newer versions.
In this window, fill in the form fields and, when finished, click the Install WordPress button.
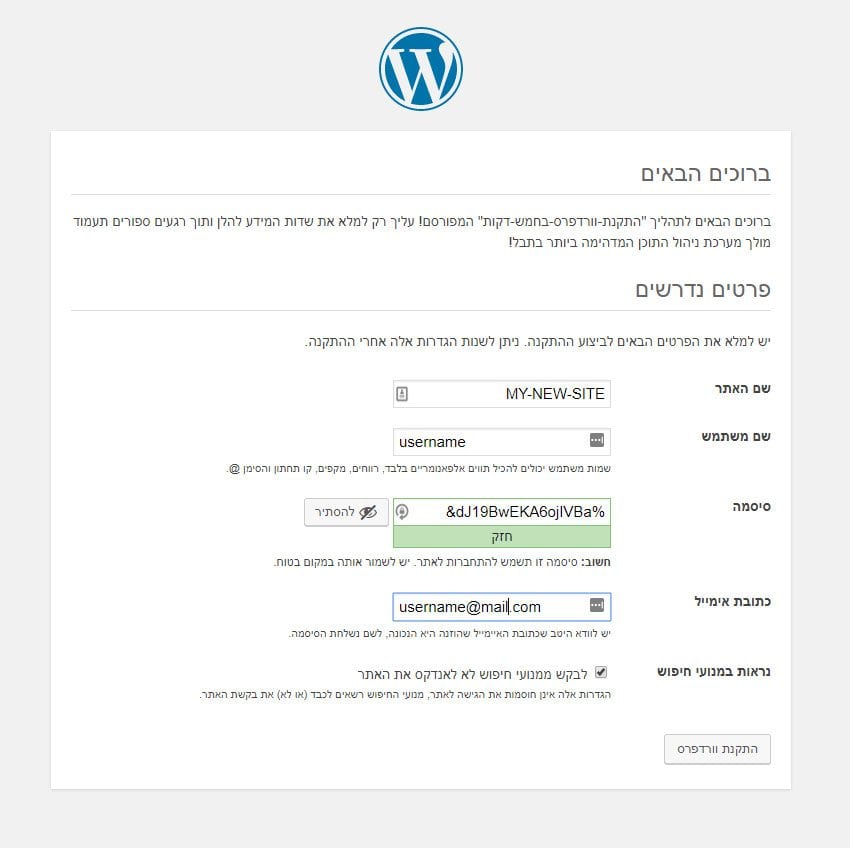 Original Hebrew WordPress interface. Follow the English instructions in this article; labels and positions may differ in newer versions.
That's it, you have completed the WordPress installation process, and it is time to start working on your new site!
Your new installation is currently running on a temporary domain provided by uPress; you can work on the site until it is time to publish it by pointing the site to a permanent domain only after redirecting DNS addresses on the domain to uPress.
Publishing the site
If you have not yet set up the DNS redirection – you need to go to to the temporary domain provided for this site.
Don't forget! When you finish building your site, you need to replace the temporary domain name with a permanent domain and update the DNS addresses in the domain management interface of the domain you purchased from the domain registrar.
The DNS addresses of the uPress servers:
ns1.upress.io \ ns2.upress.io
If you don't know how to perform the action, you can open a ticket with the uPress support department – along with the access details to the domain registrar and the domain address you want to update.
After the redirects are done and the site is live, you can start thinking about site security. Beyond uPress's security setup, we also provide Free SSL certificate for our customers.