
Most WordPress users use the WordPress visual editor mainly for writing posts or pages,
and spend the longest time using the visual editor more than any other part of the WordPress admin area.
The WordPress visual editor lets you create content in a WYSIWYG environment (What you see is what you get).
The visual editor is easy to use, but as professional WordPress developers, you have the option to increase your productivity if you learn the lesser-known tricks in this article.
We have gathered 13 tips to help you master the WordPress visual editor. The tips will teach you to use this tool like a pro.
The WordPress visual editor
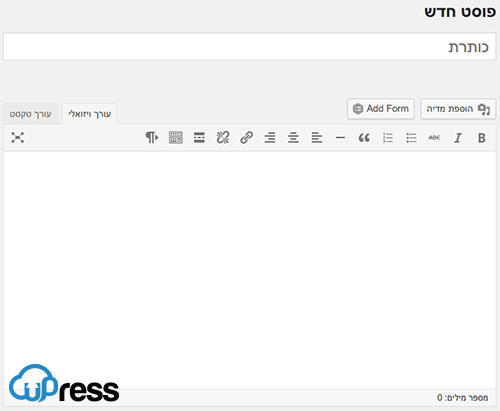
The WordPress visual editor uses an improved version of TinyMCE – open source software, just like WordPress.
The WordPress visual editor is extensible – which means you can add custom options and buttons to it. In this article we will show you how to do it.
Tip #1: Kitchen Sink
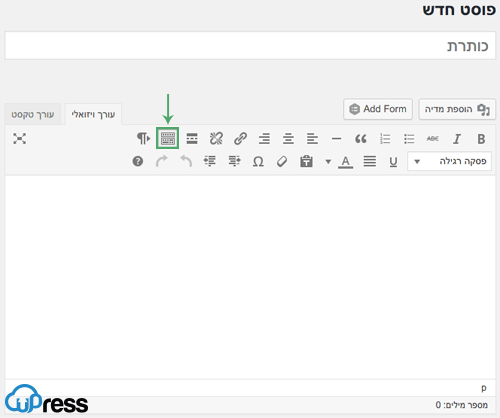
By default, the visual editor displays only a single row of buttons. The Kitchen Sink is the last button in this row.
Clicking it will display an additional row of buttons.
Tip #2. Master keyboard shortcuts
Having to move the mouse every time you need to highlight text or add a link can be quite annoying.
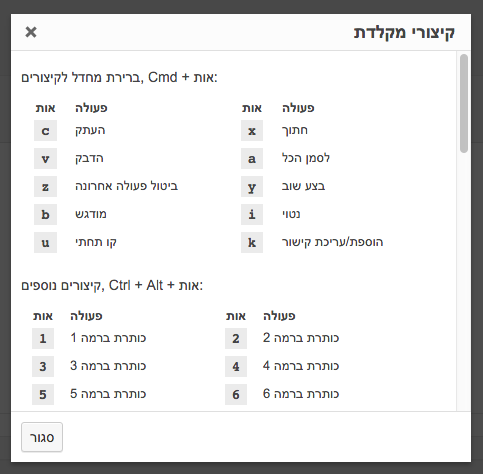
The visual editor comes with several useful shortcuts for the most common text-organization (Formatting) tasks.
Using keyboard shortcuts instead of the mouse, besides saving time, will also make work easier.
Check out the full list of WordPress keyboard shortcuts that will save you tons of time.
Tip no. 3: Single and double line spacing
Many beginner users run into difficulties with tasks such as creating paragraphs and line breaks in WordPress.
To add a new paragraph in the visual editor.
Press the Enter key. WordPress will add a new paragraph with double line spacing.
If you want to insert a line break with a single line spacing,
press Shift + Enter simultaneously.
Tip #4: Use "distraction-free" mode or rearrange the post editing screen
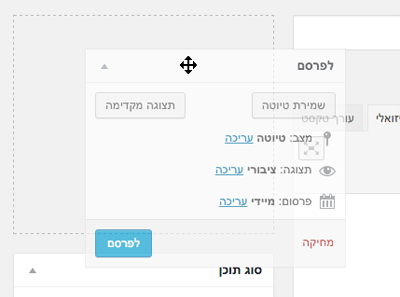
The post editor screen does not consist only of the visual editor. It also has other parts (known as metaboxes) for other uses,
such as – the author's name, custom fields, etc. When writing a post, you probably use only a small part of these boxes, while the rest just sit there.
A clean writing area helps you focus and work more efficiently. Fortunately, WordPress lets you show and hide items on the post editing screen.
In the left corner of the visual editor you will notice a button distraction-free writing mode.
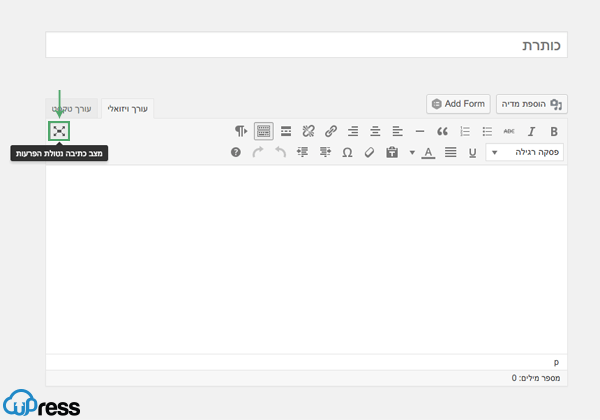
You can even rearrange the screen as you see fit. Just try dragging one of the paragraphs to a new place.
Tip No. 5: Changing font size in the WordPress visual editor
We understand that typography (the art of designing text) plays an essential role in website content.
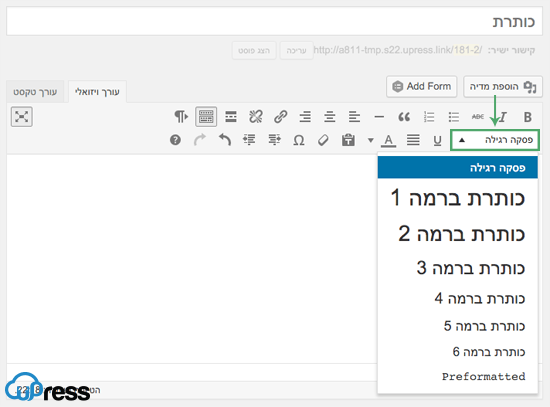
You may want to use fonts in different sizes in order to win your audience's attention, or to emphasize certain passages in a long article.
By default, the WordPress visual editor lets you change the font size for paragraphs, headings, etc.
Tip No. 6: How to add columns in the WordPress post editor
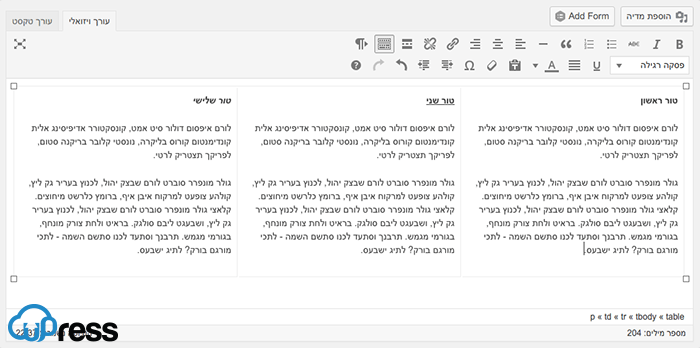
The WordPress post editor does not come with a default solution for adding multi-column content to a post or page,
However, you can add multi-column content by switching to text mode and writing HTML code to create columns. Of course, this is not the easiest way to do it.
The good news is that you do not have to know HTML in order to add multi-column content.
You can add multi-column content in WordPress posts and use the visual editor without using HTML or CSS.
There are many plugins that allow adding multiple columns to the visual editor, one of them is Advanced WP Columns.
Tip #7: Creating tables in WordPress posts
Another element missing from the WordPress post editor is a button for creating tables. Sometimes you will want to insert data tables into WordPress posts.
One way to add tables in WordPress is to use some table generator found online, but these tables are not very aesthetic.
Fortunately, there is an easier way to add tables to WordPress posts – directly from the post editor.
There are several plugins that will let you easily add tables to your post editor, one of them is TablePress.
We will expand on the use of plugins to add tables to the post editor in a separate article.
Tip #8: How to add YouTube videos in the WordPress post editor
There is no need to upload your video to the WordPress folder; never do so.
Instead, you can use services such as Vimeo or YouTube to share your video content.
First, you will need to upload your video to YouTube or Vimeo, and then simply paste your video's URL into the post editor.
Right after pasting the URL, the visual editor will turn the URL into an embedded video hosted on an external server.
Tip no. 9: Switch to the HTML / text editor
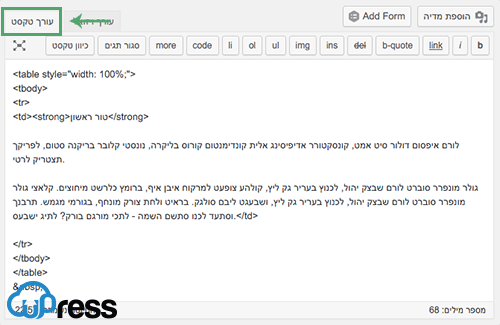
While the visual editor is an excellent tool in itself, don't underestimate the power of the text editor.
Sometimes, when you are fighting over image alignment, or in cases where the editor does not "let" you add a new line after adding an image,
Replacing with Text editor is the fastest solution. After switching to aText editor simply add an HTML tag as you wish,
Then just click on the tab Visual editor in the editor and keep writing.
Tip #10: Adding buttons without using Shortcodes
There are many WordPress plugins that let you add fairly attractive "call to action" buttons, using Shortcodes.
"Call to action" buttons are prominent, attractive buttons that catch the eye, and which usually link to a page or post that you want to promote.
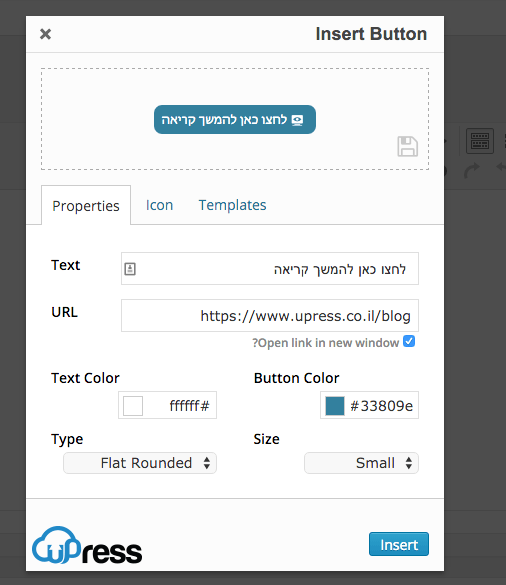
For example: a site owner who writes many articles that give information to users can create an additional button for themselves in the visual editor,
Clicking it will create a button in the post with the text "Click here to continue reading".
To start adding buttons to your visual editor you can use the plugin Forget About Shortcode Buttons.
Tip #11: Check for spelling and grammar errors
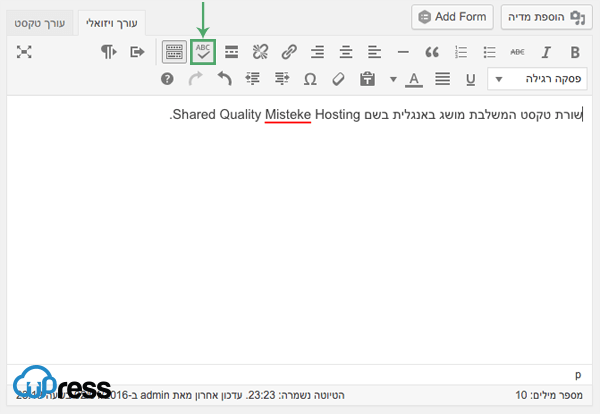
Spelling and grammar mistakes are quite common. Editing your article is challenging enough, and sometimes you cannot correct all the mistakes yourself just by rereading what you wrote.
Fortunately, there is a simple solution to overcome the problem: an error-correcting plugin.
Unfortunately, there is no error-checking plugin that works perfectly in Hebrew, but for those of you who incorporate English terms in your articles, you can use the plugin TinyMCE Spellcheck.
Tip No. 12: Paste as plain text
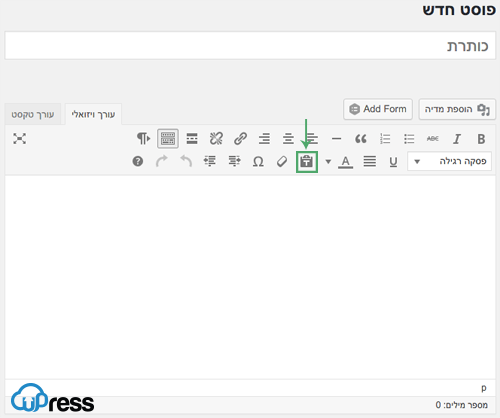
If you paste any content that was copied from elsewhere on the web, the visual editor will copy that same text design (format).
To solve this problem, you need to click thePaste as text in the visual editor, before pasting the text.
Tip #13: Adding special characters
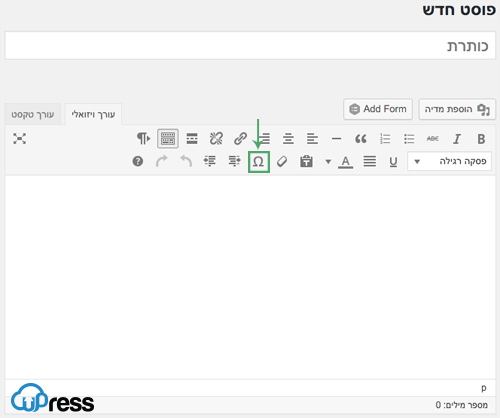
Sometimes you will want to add special characters (such as – copyright, left or right arrows, etc.) to your posts. The easiest way to do this is by using the special characters button in the post editor.
The easiest way to do this is by using the special characters button in the post editor.
Just click the button and a window containing special characters will appear. Click the special character you are looking for and it will appear in the post editor.
Remember – the visual editor is the most heavily used part of the WordPress admin panel, more than any other part of the WordPress admin area. We hope these tips helped you master the WordPress visual editor.
We hope these tips have helped you master the WordPress visual editor.
